

Binding The Magic – Building A Guitar (Part 3)
We encountered some serious threats to the final build in our last instalment – this time we see what happens when we put it all together and add the binding.


With the incursion issue from last time now dealt with, we’re ready to move on and starting putting some shape on this thing!
Sides bent:
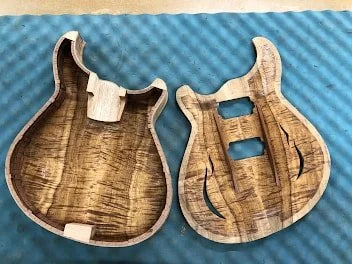
Inner carving complete, ready to join back to sides:
With a layer of protective lacquer, the grain was already starting to shine. This isn't prepped to look pretty as it's just the inside of the body but even without fine sanding and finishing that grain is popping!
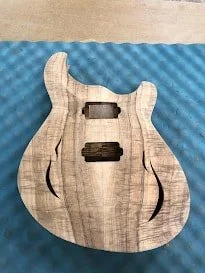
Ready to glue the top on:
Time to Bind the Guitar
The next major decision was Binding. Binding on a guitar is simply that strip of wood, plastic or other materials which outline where the sides and back of a guitar join the sides.
There were many points to consider at this point in the journey.
We didn’t want to distract from the highly figured texture of the Koa wood – however, the contrast appeared to be suited. My three favourites are either a dark wood such as Katalox, a very light Maple or (something in between the two) a nice Curly Maple... I was leaning toward either the Light (almost white) Maple or Katalox with a nice coloured purfling.
Erik had a few things to say about binding. “The curly maple seems like a nice fit. We could also do Koa binding. I think my favourite is this curly Katalox - it’ll end up dark with very subtle movement of the figuring. We could do it with a thin line of maple, or very thin maple/black/maple purfling. But I agree, we don’t want to overdo it and distract from this crazy figuring."
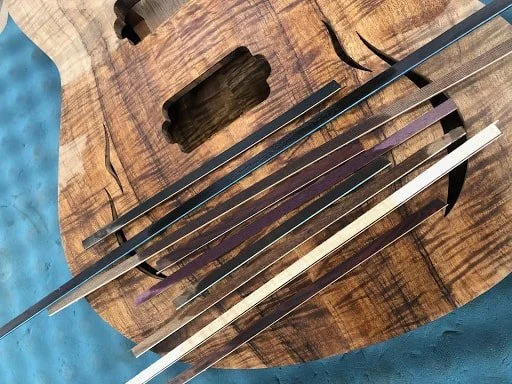
Here’s our choices: Katalox, Curly Maple, Light Maple and Koa:


After much consideration, we went with the Katalox Binding.
I left it to Erik to choose the purfling as just has so much experience and I trust his expertise to make a decision on how that might turn out.
He opted to go with katalox binding alongside with red stripe purfling. At this stage, Erik had just finished dying, laminating, and resawing the binding. While it looks pink in the photos here, it will end up a rich red in the final finished instrument.
The curl in the Katalox is more pronounced than I imagined and looks incredible. That red purfling will give it some really unique character.
At this stage, all I could think is that I can't wait to see the grain of that Koa with some Lacquer. Hoping it sounds as good as it will look!
Side-on view:

Time To Give It Some Neck – Pattern Regular or Pattern Vintage?
The Maple Neck was now cut and now ready for the trussrod and headstock veneers.
This was a tough call.
The neck carve and shape is a huge element of any guitar – I was leaning to the same neck carve as my PRS "Pattern Regular" shape neck, whereas Erik was advocating for a slightly thicker neck such, as the “Pattern Vintage”.
The shapes/measurements are depicted below. I'm referencing the PRS shapes as I'm familiar with them, since I currently play a 2015 PRS Custom 24 with a pattern regular neck carve.

By August we had finalised the neck carve to be largely consistent with the PRS neck I was used to, with only minor increases in nut-width and neck thickness.
Finally, the neck is then attached:


With the main parts all carved, the major decisions made, and the binding plus neck in place…it’s nearly done!